ラベル
応用作品例 Application Examples
(22)
幡垂飾 Bansuishoku
(11)
クテ打ちの基本 Kute Basics
(10)
角組 Kakugumi
(9)
平組 flat braid
(7)
正倉院 Shosoin
(6)
真田紐 Sanadahimo
(6)
厳島組 Itsukushima-gumi
(5)
法隆寺 Horyuji
(4)
源氏打ち Genjiuchi BBCC
(2)
丸台 Marudai
(1)
亀甲組 Kikko gumi
(1)
2019年4月2日火曜日
組み間違いを無くす工夫 Measures to avoid mistakes
長い紐を組んでいます。気を入れて組んでいるつもりですが、ふと気が緩むと、組み間違えてしまいます。そこで、間違いを無くすために、足糸を片手ごとに色分けしてみました。クテは既に色別にして、両手で持った時に左右対称になるように並べていますが、2人の組手(実際は1人2役をしているのですが)がループを交換するときに間違えてしまうことがあります。片手分ごとに色分けしておくと、間違いに早く気づきます。
1サイクルごとに2種類の組み方を交互に組む場合、今どちらの組み方をしているのか、怪しくなる時があります。それを防ぐために、手順を書いた2種類の図式を目の前に置き、今やっている方に目印(文鎮)を置くようにしました。
ループはすべて同じ長さであるべきですが、中に少しでも長いものがあると、そのループは定位置をはずれ、あちこちと動き回り、誤りの原因になりがちです。そんなループに気づけば、すぐに長さを調節します。
1サイクルが終わる毎に誤りがないか確認することを習慣づけました。
以上で少しは間違いが減りましたが、まだまだゼロにはなりません。実は今日も途中で間違いに気づき、解き始めたのですが、途中で何が何やら分からなくなって、ついにギブアップしてしまいました。このブログを書いて、気分転換をしているところです。
I am braiding a long braid. I try to concentrate on braiding. However, I make mistakes when I relax my attention. To avoid mistakes, I have colored the foot threads by group. My kute are already colored in different colors and arranged bilaterally symmetric when held with both hands. Even so, I sometimes make mistakes when two braiders (in fact I play two braiders parts) exchange loops. With foot threads colored by group, you can notice mistakes quickly.
When you braid two different patterns alternately by cycle, you sometimes get lost and wonder which pattern you are currently working on. To avoid this confusion, I put two charts of each process in front of me and place a paperweight or something on the charts that I am working on.
Basically, all the loops should be of the same length. If you have a longer loop, that loop tends to move about and cause mistakes. Whenever I notice such longer loops, I immediately shorten them.
I also make it a rule to see that everything is in order after each cycle.
With these measures above, I have come to make less mistakes, but still not zero. To tell you the truth, I just found a mistake today. I began to undo it, but in the end I got completely confused and finally gave it up. I had to write this blog in order to change my mood.
2019年3月25日月曜日
四層構造四連角組 中尊寺の紐 4-layer quadruple Kakugumi Chusonji Temple’s braid
四連角組の3つ目は、中尊寺に伝わる藤原秀衡(1122?~1187)の棺中の紐です。ということは、ミイラと一緒に入っていたということでしょうか。
これも36ループですが、すべて単色です。木下先生の「日本組紐古代技法の研究」では、カラー写真の27、模式図1-6-16、径路図および色糸配置1-6-17、1-6-18、1-6-19、本文p123に出ています。今回は3つ目ということもあり、最初からあまり間違えずにすんなりできました。
AADDを連結します。これまで試みた3つの四連角組は、それぞれ連結の仕方が少しずつ異なります。ここでは、外側のAをした後、内側のAをする前に、左右の組手のループを1度交換、もう一度交換し、もとのループを受け取ってAをします。これを木下先生は「反転連結」と呼んでおられます(1度だけ交換するのは単純連結)。反転連結では色の配置は変わりません。Dをするときは連結なしです。先生が言われる「半連結」です。したがって、色の配置を変えないときは「反転半連結」です。
色を変える時は、「全連結」をします。すなわち、AとDともに内側のループを交換してから内側を組みます。先生はこれを「単純全連結」と呼ばれます。
全部で36ループ(片手に9ループずつ)ですから、反転半連結と単純全連結を9回ずつ繰り返して1パターンです。これまでの2つの四連角組は上下の面に模様が出ましたが、この紐は側面に模様が出ます。最初は上面だけを見て失敗したのかと思いましたが、ちゃんと側面に模様ができていてほっとしました。とても美しい模様ですね。配色をいろいろと工夫するのも楽しいでしょうね。全連結をすると、ねじる回数が増えるからか、用意した糸の長さはこれまでと同じなのに、でき上がった紐は短くなりました。
略号A, B, C, D については、「クテ打ち手操作基本の4操作」をご覧ください。
This braid consists of 36 single-color loops. In Kinoshita sensei’s book “Study of Archaic Braiding Techniques in Japan” it appears in #27 in color page, diagram 1-6-16, track plan and initial color allocations 1-6-17, 1-6-18, 1-6-19 and on the main text p. 123. This braid being my third one, I could braid very smoothly without too many mistakes this time.
Two braiders braid AADD and they exchange the inner loops. The exchange is done in different ways in the 3 types of quadruple Kakugumi I have done so far. Here after A with the outer loop, braiders exchange the inner loop once and one more time, meaning that each braider receives the original loops. Then inner A. Kinoshita sensei calls it Linked Interconnection (When two braiders exchange loops only once Sensei calls it Simple Interconnection). With Linked Interconnection, the color arrangement does not change. D is performed without interconnection, Kinoshita sensei calls it Partial Interconnection. Therefore the operation for no color-change is Linked Partial Interconnection.
It is Total Interconnection when you want to change colors: meaning you braid both A and D inner loops after exchanging them (only once: simple) with your partner. Sensei calls it Simple Total Interconnection.
For the abbreviations A, B, C, D, please refer to "Kuteuchi Basic 4 Movements" .
2019年3月6日水曜日
四層構造四連角組 4-layer quadruple Kakugumi
長い間かかってようやくでき上がりました。36ループの四連角組です。木下先生の本「日本組紐古技法の研究」のカラーページの写真23と27、図1-6-20、図1-6-21、および本文125ページの「鞆淵八幡宮蔵・沃懸地螺鈿金銅装神輿の総角」です。神輿は国宝に指定されています。
全長49cm、幅約8mm、厚さ約7mmの角ばった紐になりました。素材はコットンクイーンの2本取りです。
基本的には、1人が左右に9ループずつ持ち、2人で36ループです。AACCを9回、AADDを9回してワンパターンですが、AACCでは上下2本に分かれてしまうので、木下先生は工夫して、CCではなく、ECとされています。Eは、中通し閉のDをもう半回転して、「ひねりは入るが配色は変わらない」という便利な操作方法です。そのため、実際には、AAECを9回、AADDを9回行います。
これを1人でするわけですが、それがつい間違えてしまうのです。今回は、私のモットーである「やり直しができて一人前」を実践するために、間違いを見つけるたびにほどいてやり直しました。そのやり直しがややこしい。組んでいる時間より、解いている時間の方が長かったです。でも、作品を作る時には少しの過ちも許されないので、やり直しができることが大切です。以前、組紐組み物学会のワークショップで小島先生が、「解く時も、1動作ずつ逆に戻る」とおっしゃっていたのを思い出し、解く手順も手に覚えさせました。
1本目の紐を解いては組み、組んでは解いてをさんざん繰り返し、糸もかなりくたくたになった後、新しい糸で2本目の紐を組み始めると、驚くほど間違いもなく進みました。たまに間違えても、慌てることなく、少し解いてからまた組み直せるようになりました。そうして約3日ほどででき上がった2本目が写真でお見せしているものです。
After a long time trying, I have finished a 36-loop 4-layer quadruple Kakugumi. It is shown in Kinoshita-sensei’s book "Study of Archaic Braiding Technioques in Japan": photos 23 and 27 on color pages, diagram 1-6-20, track-plan 1-6-21, and the Japanese text on page 125 and the English summary on page 329. It is called “the braids for the lover’s knot decoration for the gilt copper sacred palanquin with inlaid mother-of-pearl decoration at Tomobuchi Hachiman Shrine”. The palanquin is designated as a national treasure.
My braid is approx. 49 cm long, 8mm wide and 7mm thick. The material is Cotton Queen.
Basically, it is a 36-loop braid for two braiders holding 9 loops on each hand. One cycle is AACC 9 times and AADD 9 times. However, AACC results in two separated braids. Kinoshita-sensei’s suggestion is to give D one more half-twist and she calls it E. E is convenient when you want to turn a loop without changing colors of a bi-color loop. Therefore, the actual one cycle is AAEC 9 times and AADD 9 times.
Not so difficult for two persons, but extremely confusing for a solo-braider. I kept making mistakes. In order to produce a perfect braid, no mistake is allowed, and you have to learn how to correct mistakes. My principle is “You do not fully understand how to braid without being able to undo it.” So whenever I found a mistake, I undid it. The undoing was super complicated. I spent more time undoing than braiding. I remember Ojima-sensei of Japan Braid Society once told me in one of her workshops that you have to undo a braid step by step in a correct reverse order. So I let my hands learn how to undo a braid step by step.
My first braid was worn out after repeating braiding and undoing many times. Then I took a second set of 36 loops. This time it went amazingly smooth. Even when I made a mistake, I could calmly undo it and start again. It took me only 3 days to finish my second braid which is in the photo.
For the abbreviations A, B, C, D, please refer to "Kuteuchi Basic 4 Movements" .
2019年1月5日土曜日
腰機で腰機用ベルトを織る A backstrap belt
腰機を習う機会があったので、復習のために、家にあるもので腰機を作り、腰機用ベルトを織ってみました。
初めは道具が揃うか不安だったのですが、例の父の作業小屋で素晴らしいものを見つけました。古い電気掃除機の差し込み式の管2本です。これがあればあとは簡単。打ち込む道具として竹製の30cm物差し、糸綜絖用の竹製の割りばし、S字フック、荷造りひもと帯地の反物の芯(紙製)です。
手持ちの糸がピンクとグレーで、太さが少し違うので、厚さを均等にするために2色を交互に使いました。これは意外と便利で、糸を整える時や、糸綜絖を作るときに、同じ色が並んでいれば誤りなので、すぐに分かります。緯糸にはピンクのモヘアを使いました。
始めは用具をよく落として困りました。落とした物を拾うために身をかがめると、経糸が乱れます。でも少し慣れると、要領が分かってきました。開口に物差しを入れて糸に直角に立てる時は、腰を引いて経糸をピンと張れば物差しは落ちません。反対に糸綜絖を持ち上げる時は経糸を緩めるとうまくいきました。これが分かると、落し物がぐんと減りました。腰と手の動きを合わせてリズムをとれば、楽しい作業です。
実は教室では、私は腰機に向いていないと思っていました。機に括りつけられているという圧迫感が好きになれませんでした。身体が自由に動けないと、思考まで固まってしまって、少しでも間違うとパニックになっていました。でも、こうして家でゆっくりと、少しずつ慣れてくると、腰の圧迫感まで快く感じ始めました。不思議なものです。家にあるもので機が織れたという満足感も手伝って、あっという間にベルトが織り上がりました。
古代の人達は世界中で、身の回りの道具を使って機織をしてきました。少しでも作業が楽なように、少しでも美しい布ができるように、道具や手順を工夫していました。腰機で織る時は、そんな古代の人達が身近に感じられる楽しい時間です。
I had a chance to earn backstrap weaving. In order to review the process at home, I made a backstrap loom with the material I find at home and wove a belt for backstrap weaving.
I was not sure if I could gather all the necessary tools. However, in my late father’s old shed, I found the ideal tool. They were two pipes of an old vacuum cleaner. The rest of the tools are easy to fetch; a 30cm ruler made of bamboo for beating, a pair of disposable bamboo chop sticks for a thread heddle, 2 S-hooks, packing ropes and a paper core of a roll of Obi (sash for kimono) cloth.
For warps I had two types of yearns, pink and grey, with slightly different thickness. In order to make the even thickness I arranged them alternately. That turned out to be a good idea. When arranging threads or making thread heddle, if you find the same color threads side by side, it is a mistake. So easy to spot a mistake. I used a pink mohair as weft.
At the beginning, I had a hard time because I dropped tools very often. When I lean forward to pick up the dropped item, the warps got tangled. As I got used to, I got a knack. When I insert a ruler and keep it upright in the shed, I should draw back my back to tighten the warps, and the ruler stays firmly in the shed. When I pick up the thread heddle, I should loosen the warps with my back. After learning this, the operation went smoothly without my dropping things so often. Once you get the rhythm of the movements of your hands and back, it is an enjoyable work.
Honestly, while in the class I was not sure that I liked backstrap. I did not like the pressure that I felt around the waist. I felt like I was nailed down to the loom. Because I could not move freely, my thought lost freedom as well. So when I made a small mistake, I panicked. But as I worked slowly at home and gradually got used to it, I started feeling even the pressure around the waist comfortable. It was an amazing change in mood. I was also satisfied that I could make my own loom using the things I found at home. It did not take so long to finish the belt.
People in ancient times around the world did weaving using the tools available to them. They endured to make the operation easier and to weave more beautiful textile by improving their tools and procedures. I had a wonderful time with the backstrap weaving feeling a little closer to ancient people.
2018年12月17日月曜日
紫茶斜格子一間組 Purple and Brown Oblique Lattice Single-unit braiding
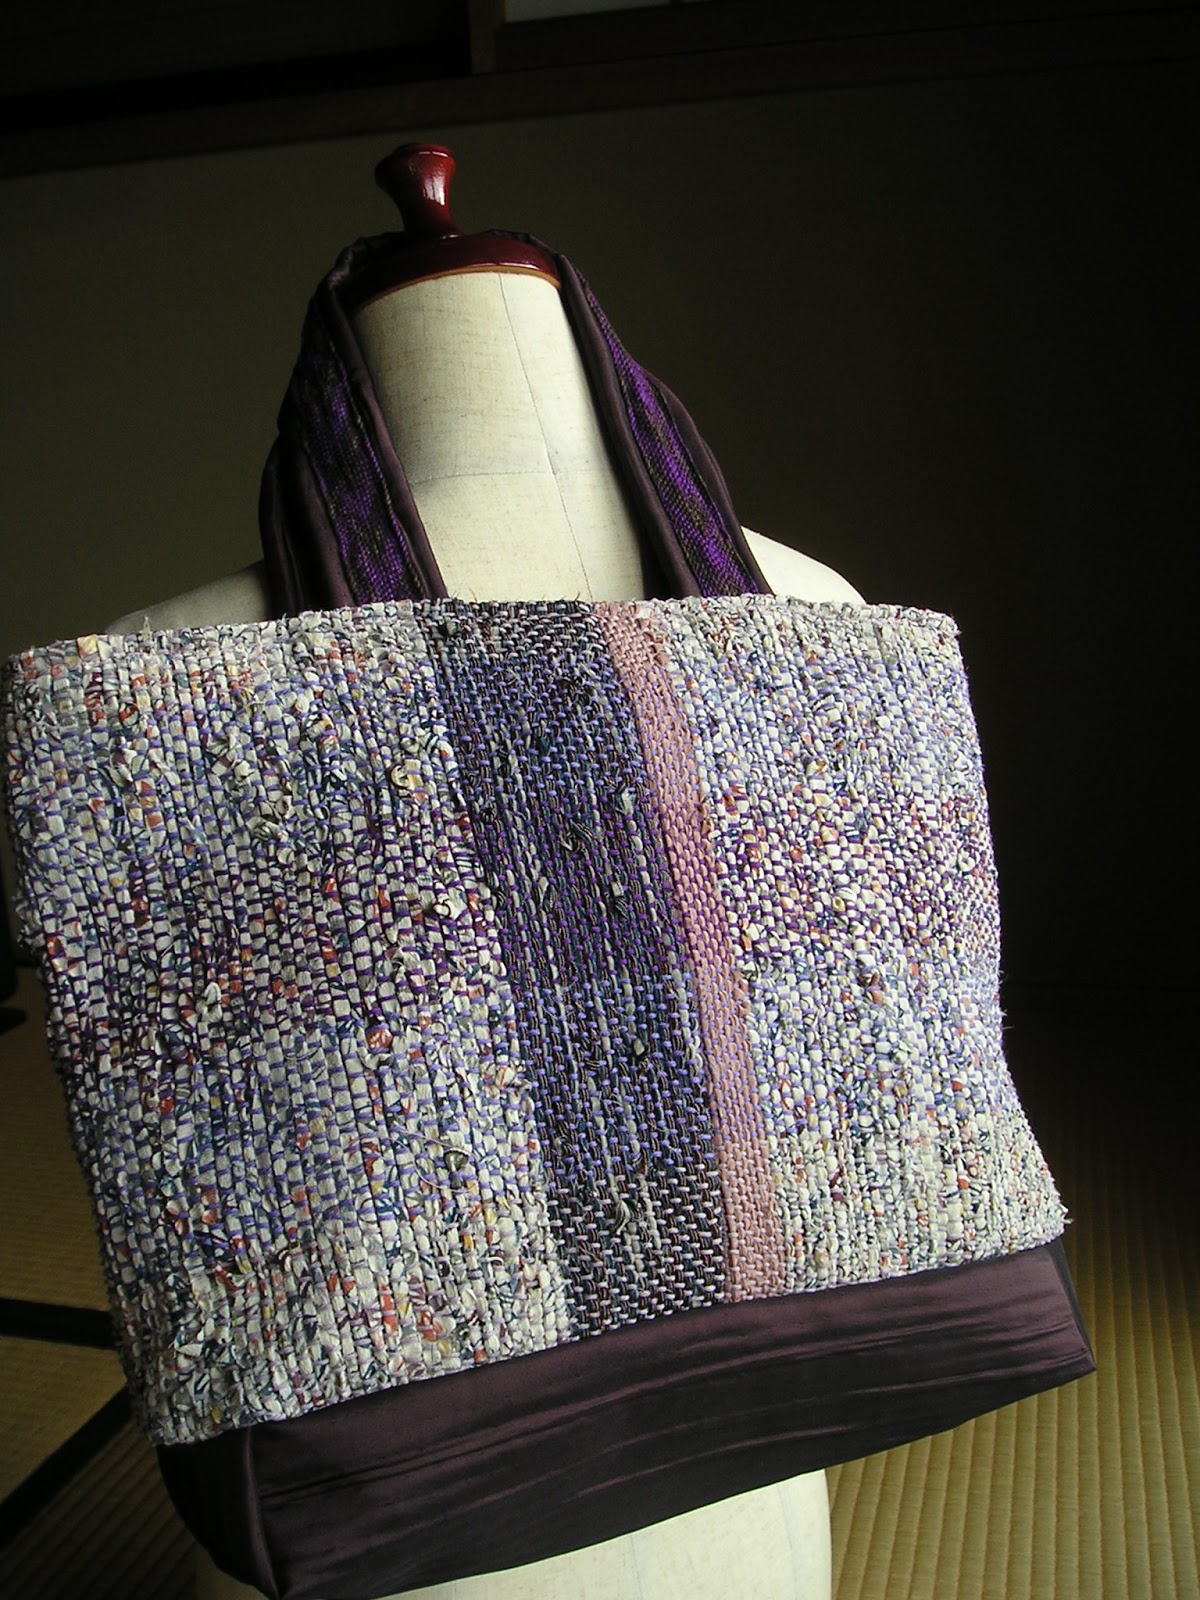
裂き織のバッグの持ち手を組みました。一間組です。これまでは、組目がはっきり見えるように、反対色などのコントラストの強い色を合わせて組んできましたが、今回は以前に織った裂き織布に合わせて、紫と茶の濃淡計4色15ループで組みました。こういう配色もいいなと思いました。使用糸はコットンキングです。
Another way to braid longer braids is, as I discussed showing Ingrid Crickmore’s method, Catapilar. After wondering which is easier, I opted for the center-start which I got used to with Bansuishoku.
長さは55cmは欲しいので、90cmの糸を用意し、長さの中心から組み始めて端まで組み、中心に戻って反対側を組みました。写真でも分かると思いますが、糸が長い時ほど、締める力が弱いので1パターンの長さが長く、糸が短くなってくるとしっかり占めることができるので、1パターンの長さが短くなっています。パターンの長さは最大約1cmの差ができてしまいました。糸の長さに関わらず同じ強さで締めることができるようにならなければ。
でき上がりは、2.6cmx55cmになりました。バッグも仕上がりました。底の部分にはカーテン生地の端切れを使っています。
Braided a pair of bag handles in purple and brown, using a
technique of Single-unit braiding (ikken-gumi).
I have been using contrasting colors, like opposite colors, so that I
can clearly see the braiding. This time,
in order to match the torn-yarn woven fabric that I made some time ago, I chose
4 colors, dark and light purple and brown, 15 loops. This similar color combination is also nice,
I thought. The material is Cotton King.
I needed the length of over 55cm.
So I prepared 90cm long threads and started from the center of the
length, braided till the end, and started from the center again to the other
end. As you may be able to see from the
photo, the length of the pattern varies.
When you have long threads, your tightening power is weakened, making
the pattern length longer. With shorter
threads you can tighten firmly and get shorter patterns. The difference between the longest and the
shortest was about 1cm. I must train
myself to be able to tighten with constant power regardless of the thread
length.
Another way to braid longer braids is, as I discussed showing Ingrid Crickmore’s method, Catapilar. After wondering which is easier, I opted for the center-start which I got used to with Bansuishoku.
The finished braids are 2.6cmx55cm. I also finished the bag. The bottom part is a curtain remnant.
2018年9月30日日曜日
2人で四連角組 Dueted Quad Kakugumi
1人で四連角組を間違えることなくできるまで、かなり練習しました。慣れてしまえば面白いようにできるのですが、それまで何度間違えてやり直したことか。昨日はクテ打ちの仲間2人に2人操作で四連角組をしてもらいました。ビデオに撮りましたので見てください。
1人だと、1サイクル10ステップですが、2人だと6ステップで、とても速いです。2倍以上速いと思いました。本当は1サイクル終わるごとに、組みあがった部分の近くを手にもって引き締めるのですが、3人しかいなくて、私がビデオカメラを持っているので、引き締めていません。
いつも一緒にクテ打ちを楽しめるパートナーが近くにいてくれるといいのに、と思いました。
I had to practice a lot to be able to braid Quad Kakugumi alone. Once you get used to it, you can braid smoothly, but you need to make countless mistakes before reaching that stage. Yesterday, I had a chance to meet my Kute group members and asked them to braid Quad Kakugumi in pair. Here is the movie.
You need 10 steps when you braid solo, whereas 6 steps are enough for a pair. Thus it is very fast. I had an impression that it was two times faster than solo. In fact, I should have tightened after each cycle, but we were only 3 of us and I was filming with a video camera. So there is no tightening step in the video.
It would be wonderful if I had a Kute partner living in the neighborhood and could enjoy duet more often.
2018年9月21日金曜日
母とコラボ第2弾 Collaboration with Mother No. 2
リビングのレースカーテンが傷んで来たので、新調することにしました。カーテン屋さんへ行くと、ワゴンにカーテンの端切れがいっぱいあって、備えてあるビニール袋に入るだけ入れて500円ということでした。カーテン地はしっかりしていてバッグに丁度いい厚さです。ホクホク顔で帰ってくると、母がその中から気に入った生地を見つけて、ショルダーバッグに仕立てました。私は「紐は私にお任せ」と言って、唐組のサンプルを2つ作ったのですが、母が、「地味すぎる」と言って、OKがでません。それでは真田紐はどうでしょうと作ったものが合格でした。
これまで作った真田紐を並べてみました。市松模様も飽きてきたので、今回は雑誌で見た縦縞にしてみました。雑誌では男物の下駄の鼻緒に使っていたものです。なかなかきりっと素敵に仕上がりました。
Our living room curtains are worn out and we have decided to order new ones. At a curtain shop, there was a wagon-full of curtain fabric remnants. It costs 500 yen for a small plastic-bagful. Curtain fabrics make good bags. I stuffed the fabric as much as I could. I came home smiling. My mother chose one of them and made a shoulder bag with it. I offered to make a belt and made two Karakumi samples. She does not accept them saying “They are too quiet.” Then I made a Sanadahimo, which she liked.
These are the Sanadahimo I have made. I am getting tired of checkerboard patterns, so I made a stripe that I once saw in a magazine. In the magazine, the braid was used as sandal thong for men. I liked the sharpness of the pattern.
これまで作った真田紐を並べてみました。市松模様も飽きてきたので、今回は雑誌で見た縦縞にしてみました。雑誌では男物の下駄の鼻緒に使っていたものです。なかなかきりっと素敵に仕上がりました。
Our living room curtains are worn out and we have decided to order new ones. At a curtain shop, there was a wagon-full of curtain fabric remnants. It costs 500 yen for a small plastic-bagful. Curtain fabrics make good bags. I stuffed the fabric as much as I could. I came home smiling. My mother chose one of them and made a shoulder bag with it. I offered to make a belt and made two Karakumi samples. She does not accept them saying “They are too quiet.” Then I made a Sanadahimo, which she liked.
These are the Sanadahimo I have made. I am getting tired of checkerboard patterns, so I made a stripe that I once saw in a magazine. In the magazine, the braid was used as sandal thong for men. I liked the sharpness of the pattern.
登録:
投稿 (Atom)