2022年10月28日金曜日

ブラウスに平織三間組 Sangengumi for a drawstring blouse


ブラウスを作りました。組紐を強調したデザインです。この型紙は30年以上も前に雑誌で見ていつか作ろうと思って取ってあったのですが、なかなかよい紐が見つかりませんでした。今なら自分で好きな紐が作れるのだと思いつき、作ってみました。生地は地味なオリーブグリーンで、組紐に使ったのは明るい黄緑です。糸はハマナカのアプリコで、ベージュと黄色にはラメが入っていて華やかです。


13本の平織三間組。初期配置は次の通りです。

〇〇〇〇〇〇 ◎◎◎◎●●

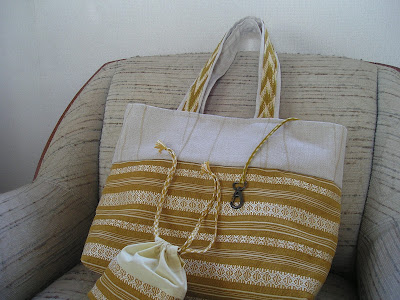
110cm必要なので、半分組み、真ん中で写真のように輪でつないでいます。アプリコは細くて、組むのに時間がかかるので、中央の40cm程は組んでいません。

思った通りの幅と厚みの紐ができ上がりました。30年前には自分でこんなに素敵な紐が作れるなんて思いもしませんでした。


I made a blouse that features a kumihimo.  I found the pattern of this blouse more than 30 years ago in a magazine and kept it for so long.  I had been trying to find a nice string for this blouse but I could not.  Now that I can braid, I can make whatever braid I want!  The material is rather quiet olive green, and I used bright yellow green for the string.  The yarn is Hamanaka’s Aprico.  The beige and yellow yarns are lame yarns, giving the finished braid some gaiety.

The braid is Hiraori Sangengumi with 13 kutes.

〇〇〇〇〇〇 ◎◎◎◎●●

The braid is 110cm long.  I first braided a half of the length, then connected the next half as the photo shows.  Aprico is thin and fine and takes long time to braid, so I did not braid the middle 40cm.

The finished braid’s width and thickness is exactly what I wanted.  I never dreamed 30 years ago that I would be able to make such a beautiful braid with my own hands.


2022年9月21日水曜日

平源氏組でポシェット肩紐 Hiragenji-gumi for a shoulder strap


ラッキーなことに丸台を頂いたので、いろいろと試しています。多田牧子先生の「うつくしい組みひもと小物のレシピ」を見ながら、今までの所、16玉までできるようになりました。どちらかというと、上下左右を入れ替える動きが初心者にはやり易いと思いました。糸が水平垂直に動くだけですから。平源氏組は操作が簡単で、見栄えがとてもいいと思います。

私は、実際に使うものを作るのが好きなので、ポシェットの肩紐を組んでみました。クテ打ちの時と同じように考えて、約7割の長さになると思って最初に用意した糸は、短すぎました。仕上がりの2倍以上の糸が必要です。今は練習中なので、糸はコットンクイーンを5本引き揃えて使っています。糸の初期配置は下記のとおりです。


ポシェットの生地はヤフオクで手に入れた博多織の帯です。きれいな生地ですが、私の平源氏組も負けていないと思います。


I had a luck to get a free Marudai.  Since then I have been practicing various patterns referring to Makiko Tada sensei’s “Recipes for Beautiful Kumihimo and Small Kumihimo Accessories”.  Currently, I can manipulate up to 16 tamas.  I thought the movement to transfer up, down, left and right was easy for beginners.  This is because the thread only moves horizontally and vertically.  I love Hiragenji-gumi that is easy to manipulate and looks gorgeous.

I like to make things that I use in my daily life, so I braided a shoulder strap for a pochette.  The thread I prepared first, thinking in the same way as the case of Kute-uchi, was too short.  I finally learned that I need more than double length of the finished product.  As I am a beginner, I use Cotton Queen, using 5 threads as 1.  The initial color arrangement is as below.

The pochette is made of a Hakataori belt which I got through Yahoo Auction.  It is beautiful, and my Hiragenji-gumi is also beautiful, I think.


2022年2月21日月曜日

斜格子一間組でバッグ持ち手  Oblique Lattice Single-unit braiding


久しぶりのブログ更新です。プレゼント用に、ヤフオクでゲットした夏の博多帯(黄色)とカーテン地でバッグを作りました。同じ帯地を使って以前も作りましたが、今回は組み合わせたカーテン地との配色がさわやかな感じに仕上がりました。持ち手は以前のは真田紐でしたが、今回はクテ打ちで斜格子一間組です。鍵をぶら下げる紐は角組(CC)、残った帯地で作った巾着の紐はハマナカのアプリコで重打(CD)です。アプリコはコットンキングより細く、繊細に仕上がります。ベージュはラメ入りで豪華になりました。


Long time no see.  I made a bag using a yellow Hakataori kimono-sash for summer which I got through Yahoo Auction and curtain material.  I made another bag with the same Hakataori sash before.  This time, I matched it with  different curtain material, which gave the bag brighter impression.  The handles are Kute-uchi oblique lattice single-unit braiding, though the last time it was Sanada-gumi.  The key-holder is Kakugumi (CC) and the braids for the drawstring bag is Shigeuchi (CD) with Hamanaka’s Aprico.  Aprico is finer than Cotton King and the finished braids are more delicate.  The beige thread is spun with gold lame giving the whole braid a gorgeous look. 


2021年4月18日日曜日

靴ひも 重打または高麗組 Shoe strings: Shigeuchi or Koraigumi


長年愛用してきたスニーカーの紐がついに切れました。実はこの紐は既に二代目です。それほどこの靴と私は相性が良いということです。靴もずいぶんくたびれているのですが、もう少し頑張ってもらおうと、三代目の紐はクテ打ちで作ることにしました。

コットンキングで、7本の重打AB)です。90cm必要なので、長さの中央で輪にして両方へ組みました。

思った以上に素敵にできました。古びた靴も喜んでくれているのではないかな。これで足取り軽く、出かけるとしましょう。

The sneaker strings that I have been wearing for many years have finally broken.  In fact, this pair is already the second generation.  That means these shoes and I get along very well.  The shoes themselves are very old, but I want them to last one more generation.  So this time I made the strings with Kute.  

I used 7 Kute and braided Shigeuchi (AB) with my favorite Cotton King.  The strings have to be 90cm long.  I started in the middle of the length to one end, and restarted from the middle to the other end.

I am pleased to find the finished strings much nicer than I had expected.  Perhaps my old shoes are also happy.  With a new pair of strings, I shall go out for a walk with light steps. 


2021年1月19日火曜日

エコバッグ用止め紐 重打または高麗組  Braid for Eco bag: Shigeuchi or Koraigumi


いつも行く薬局で3周年のお祝いとしてエコバッグを頂きました。ちょうどいい大きさと生成りの色が気に入って、日常に使うことにしました。折りたたんだ時にまとめる紐がついていなかったので、重打(AB)で28cm組みました。材料はコットンクイーン3本取り、8ループです。ボタンを通す穴は、AAで組みます。


今度薬局へ行ったら、薬剤師さんに見せなくては。

The pharmacy I usually go celebrated their third year in business and gave us an eco bag.  I liked the color and size of the bag, so I use it every day.  As it did not have a string to keep the bag folded, I braided a 8-loop Shigeuchi (or Koraigumi or AB) for 28cm.  The material is Cotton Queen.  The button hole part is AA.  

Next time I go to the pharmacy, I have to show this to them. 


2021年1月3日日曜日

ポシェット用肩紐 Shoulder belts for two pochettes


帯地を使ってポシェットを2つ作りました。肩紐は長さ90cm18ループの縄連組です。90cmの長さが欲しいので、コットンキングを130cm用意しました。これでは1回で組むには長すぎるので、前にもやったIngrid Crickmore のやり方で2回に分けて組みました。


写真は糸の半分の位置にクテをつけ、余った糸をかぎ針で鎖編みにし、輪にしてぶら下げた所です。この鎖の輪が組む時に邪魔になるのではと思いましたが、案外気にせずに組むことができました。

それよりも気になるのは、半分の地点で、足糸を付けるために、糸に玉止めをするのですが、これは解くこともできず、残ってしまいます。しっかり足糸を止めることができ、しかも後で簡単に解くことのできる糸結びの方法を考えなければなりません。 実際にポシェットを使うときには全然気にならないのですが、こうして写真でお見せするときにはやはり気になります。


ファスナーの引手金具には二連角組(AADD)の紐を付けました。作品に仕上げるまでに糸の配色や組み方をあれこれ考えるのは楽しい作業です。しばらく組紐から遠ざかっていましたが、こんなふうに作業途中の紐が休み台にかかっている光景は、何となく心和む気がします。

Made two pochettes from obi sash material.  The shoulder belts are 90 cm long Joren-gumi with 18 kute.  I prepared 130 cm long Cotton King threads in order to make 90 cm belts.  130 cm is too long for kuteuchi, so I devided them into two as I did before following Ingrid Crickmore’s method.  The photo shows the threads with Kute attached at the half length points, with the remaining length crocheted in chains and made into a circle.  I was afraid that these chain circles might disturb braiding, but it proved no problem.

What bothered me was rather the knots of the threads which hold the foot-threads of Kute.  These knots cannot be undone and can be seen in the finished work.  I need to develop a knot that can hold foot-threads firmly and can be undone easily.  My knots are almost unseen while in use, but still bothers me when I show them in the photos.

I made a Double Kakugumi (AADD)braid for a fastener.  It is a joyful moment when I chose color arrangements and type of braiding.  I was away from kumihimo for a while, but having a pair of my Kute Rest Stands with threads hanging on them makes me smile. 


2020年9月27日日曜日

平組二間組を偶数のクテで組む  Flat braid Nikengumi with even-numbered kute


前回紹介した青柳淑枝さんの「アンデスの組紐を訪ねて」の43ページに24本平組紐の組み方が載っていたので、組んでみました。24本の糸をまとめて、クリップでボードに固定して組みます。反対の端は固定しません。フリーエンドです。これは大変でした。いつもクテで糸を引っ張って操作しているので、フリーエンドには慣れていません。引き締め方が足りないのか、出来上がりは不揃いな組目になってしまいました。

今度は慣れたクテでやってみました。本と同じく24本の糸、すなわち12本のクテを使いました。左端のクテを取り、左から2越で右に進むと、最後にクテが1本残ります。最後のクテ1本を越えて一回捻って右端に置きます。

これにはいいことがあります。今までは二越の時は2の倍数+1本、すなわち奇数のクテでしていましたが、これだと、中心の片側で三越になって目立ってしまいます。でも偶数のクテで組むと、中心の片側は一越、反対側は二越になって、あまり目立ちません。

青柳さんの本の43ページでは、青柳さんの先生は中心が規則正しくきれいになるように、左の端は一越から始めておられます。なるほど、こういうちょっとしたことが仕上がりを左右するのだなと思いました。

写真は上から、24本フリーエンド、クテ12本、クテ13本です。

On the page 43 of “Exploring the Braids of the Andes” by Ms. Yoshie Aoyagi, which I introduced in my last post, there are instructions on how to braid a flat braid with free-end.  I tried this braid.  You tie 24 threads and fix the knot with a clip to a board. The other ends are loose, which was hard for me.  I am used to pulling kute tight.  Perhaps my tightening was not good enough, the finished braid has irregular stitches.

Then I tried braiding with kute.  Like in the book, I prepared 24 threads, eg. 12 kute.  You take the left-end kute (operating kute) and it goes over 2 kute and under 2 kute.  In the end you have one kute left on the right hand.  The operating kute goes over that last kute.  Then you turn the operating kute once and place it to the right-end.

I found a good point about this method.  Till now, I always used odd-numbered kute for Nikoshi flat braid. Nikoshi means over 2 threads.  The braid has a stitch over 3 threads on one side of the center, which stands out.  However, with even-numbered kute, you have a stitch over 1 thread on one side of the center and a one over 2 threads on the other side, which is less outstanding than a stitch over 3 threads.

On the page 43 in Ms. Aoyagi’s book, her teacher starts from left by going over one thread and then over 2 so that you have nice and regular stitches in the center.  I was impressed to learn that with such a small care, you can have much better results.

The photo above shows from the top to the bottom 24 threads free-end, 12 kute and 13 kute.